How to personalize your blog tabs or pages
I’m so happy when I received this message from a friend on Facebook.
A lot of bloggers want a personalized blog or atleast with a touch of
their personality. So I’m writing this post to share with you how to customize
your blogger tabs or pages.
Step 1: Identify the pages/ tabs you want for your blog and create a
design
In my case, I want my blog to have 6 pages:
You can do it in Photoshop or for simple shapes and artworks, you can use
Powerpoint or Publisher and save it as JPEG file.
Step 2: Log in to your blogger account and create a new post
Note: Do not publish this post. This is for html coding purposes. You
can save this as draft.
Select the photo you created earlier. Select “Add Selected”
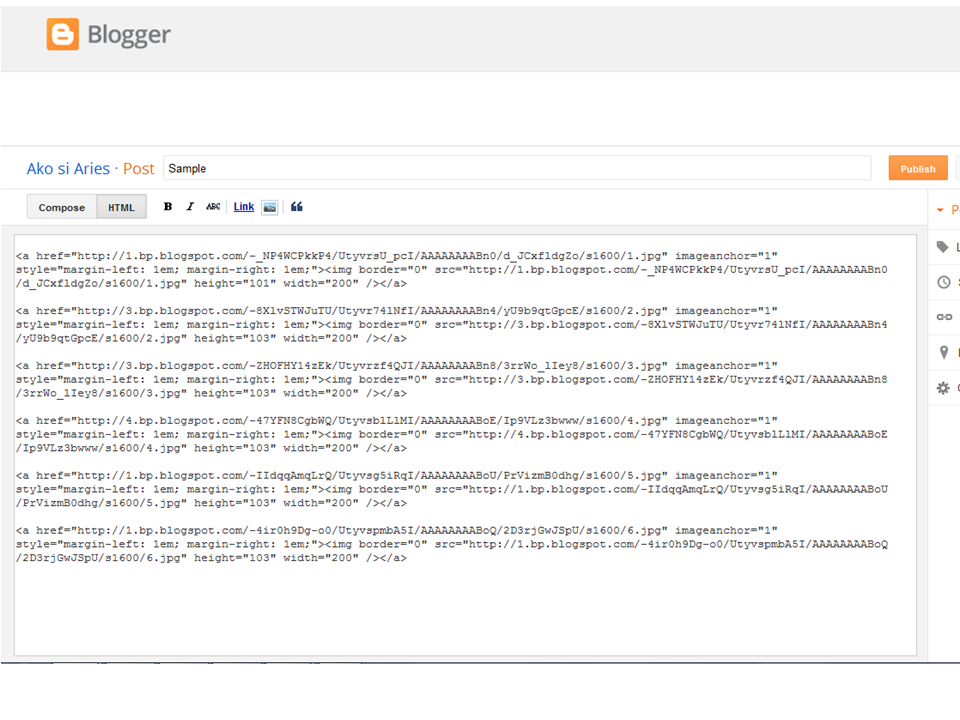
Right beside the “Compose” button is the “HTML”. Click it and it will
show numerous codes like this:
Delete all texts highlighted in RED BOX.
Once deleted, it will look like this:
Link your pages to specific link. Replace the texts in BLUE HIGHLIGHT with
your specific link:
In my case, I link the following pages as follows:
HOME: www.akosiaries.blogspot.com
ABOUT: { link to my blog post about myself }
LOVE: { www.akosiaries.blogspot.com/search/label/love }
LIFESTYLE: { www.akosiaries.blogspot.com/search/label/lifestyle }
LANDSCAPE: { www.akosiaries.blogspot.com/search/label/landscape }
ETC: { www.akosiaries.blogspot.com/search/label/etc }
If you have specific landing page, just paste it directly or if you
want to show specific post from your blog, use LABELS. Use this formula:
Once done, copy the codes and follow the step 3.
Step 3: Go to blog LAYOUT Page
Click add gadget:
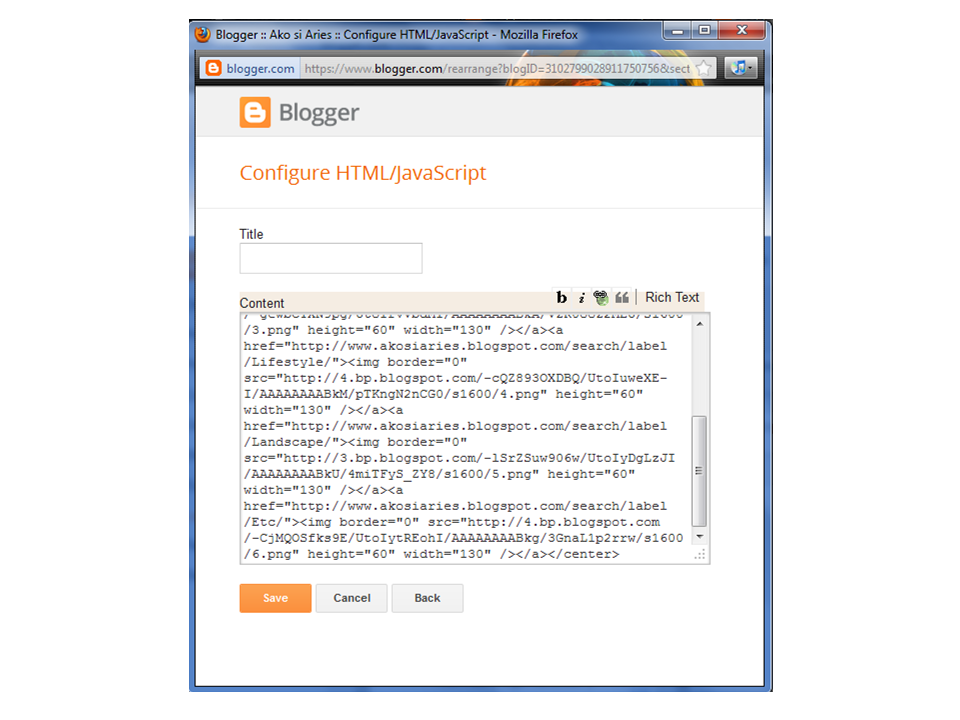
Select “HTML/ JavaScript”
Then Paste the codes:
Place the gadget below your header and save.
You’re done. You have your personalized blog pages already!!
Hope this helps. If you have questions or clarifications, just comment on this post. Thank you! :)
Hope this helps. If you have questions or clarifications, just comment on this post. Thank you! :)


CONVERSATION